Showing posts with label portage. Show all posts

Friday, 14 August 2015

Lessons Learned: 10 Tips for Your First Portaging Trip - Part I

Hot off our very first portage trip Sam and myself learned some valuable lessons and want to share them with you. Here are 5 things I learned about what to do before, after and during your portage trip.

1. Ditch the Packaging and go All Ziploc

A bear canister fills up fast with less food than you’d imagine. My recommendation is to take any food that has air in it and put it into a Ziploc bag. This will save you a ton of space. After repackaging use a marker or painters tape and label each bag to easily identify your food. 

Bonus Tip: Load the canister or bag in order of your consumption plan (day 1’s meals at the top and your last days meals at the bottom). That way you don’t have to dig deep to get your eats or repack it daily.
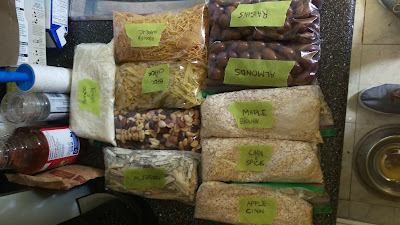
Transferred food from original packaging to Ziploc bags
Food transferred from store packaging to Ziploc bags. Saves a ton of space in your bear canister.


2. Baby Wipes over Toilet Paper

Ditch the toilet paper and jump over to baby wipes. Not only do they pack up smaller but they can also get wet and are multi-purpose (washing your face, hands, wiping your butt, etc). The only concern is their scent, so save some room in your bear canister or bear bag. Trust me your butt will be much happier after crouching in the bush with these!

3. Invest in the Right Gear

Too often people buy an inferior product because of the price tag. The truth is you get what you pay for; you don’t need to run out and buy a $4000 tent. But think about this, do you want to spend $300 on a tent now that is built to last 20 years or do you want to spend $80-100 every 3 to 5 years on one at your local big box? The way I have approached gear is that I am slowly building up to having exactly what I want by making key purchases every season. I’m spreading out what I can deal with and what I need to purchase in order to maintain my budget. Make one big purchase (tent, sleeping bag or pack) and add on one slightly less expensive item and within 3 summers you will have a superb set up without breaking the bank.

Ed's Kelty Grand Mesa 2 tent set up with a starlight sky background
Ed's new Kelty Grand Mesa 2 tent. Lighter and easier to assemble than his old tent.

4. Aim to Pack Less but Pack Smart

Less is more, especially when you have to carry everything you will need on your back. The keyword there was what you “need”. Reduce clothing to items you can stretch out for the duration of your trip and pack layers. On a recent 4 day portage trip I wore the same shirt, shorts and sweater for the entire trip; I’m not trying to impress anyone. Also make sure you have only essential items that you are able to comfortably carry. Real Man Travels recommends laying out all of the gear you think you’d need on the floor of your home. Then start to pick out non essentials until you are left with about 60-75% of what you had. From there load up your pack and see how it feels. If it is still too heavy think outside of the box on how to reduce, or give weight to a partner that has a lighter load. Just remember that walking around the house for 2 minutes with a full pack is not the same as a trail for an hour or more.

Bonus Tip: Pack a bag with fresh underwear and other clothing and leave it in your vehicle for when you re-enter society. Fresh clothes will go a long way for the ride home, or that pit stop at a pub for a much needed beer.

5. Portage with the Right People

This may be an oversight but if you are going to be canoeing and camping out in the wild for an extended period of time, you better like the people you are going with. Let’s face it, a trip can be make or break depending on the people attending. Positivity is key so eliminate anyone who will be a negative strain; the last thing you want is a Debbie downer moaning and crying when the day is filled with bugs, rain or some other undesirable element. If you are blending groups of friends, choose wisely who can attend. Look for similar humour styles, similar attitude towards the outdoors, similar interests, etc.

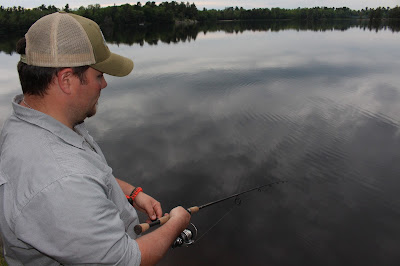
Sam and Derek shore fishing
Fishing with a straw hat is an automatic in with our group. Sam and Derek doing some shore fishing. 

Those are my 5 things learned from this portage trip, be sure to come back later and check out part II when Sam will reveal what he has learned.

Tuesday, 4 August 2015

Real Man Tested: GSI Pinnacle Soloist

A few members of the Real Man Travels team recently went on a four day portage trip in Ontario's beautiful Massasauga Provincial Park. This was our first real portage trip together with no coolers, luxuries or special amenities, so we had to be smart about the items we packed. The decision to mostly use just add water food for our meals made the most sense for weight and convenience. Enter the GSI Pinnacle Soloist cook set to boil all of the water for my meals. I bought this set at MEC for $45.50 + tax and put it to the test. Here are the results I found:


1. What You Get

The GSI Pinnacle Soloist comes with a 1.1L pot with an attached handle that swings up and down, a lid with an integrated strainer and spout, a 590mL cup with a removable insulation strip, a “foon” (telescopic spork), a stove bag made for an MSR Pocket Rocket style stove (stove not included), and a stuff sack that can double up as a wash basin.

Included items in the GSI Pinnacle Soloist
Included in the set: A 1.1L pot, telescopic foon, cup with insulating strip, a wash basin and a strainer/lid.

2. Look and Feel

When I first went to MEC and looked at this set my initial reaction was that it is small... much smaller than I thought it would be. After unboxing it at home and seeing how it all stacks up within itself I realized that this was a well thought out product.

The pot feels sturdy and light and the rubberized handle sits firm in its locked positions. The plastic bowl has a little bit of flex but not too much to be nervous about squeezing out your contents while holding it. The pot lid is a hard plastic and I was skeptical about it not melting when in use. The stuff sack has a rubberized interior which allows it to stand on its own making it believable for use as a wash basin. The stove bag was a generic pouch made of canvas material. The telescopic foon (spork) felt flimsy and cheap in comparison to the rest of the superior contents.

3. Ease of Use

Unpacking and packing up the stove is a breeze as all the components fit into each other perfectly. As for actually using the product, it’s as simple as: fill the pot with water, set it on a lit stove and let the water boil, add food, fill your bowl with your cooked food, eat with the foon and clean up.


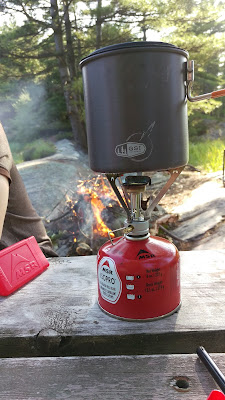
GSI Pinnacle Soloist on a MSR Pocket Rocket Stove
Simple stove to boil water!

4. Actual vs. Advertised

The GSI Pinnacle Soloist is advertised as a trail solution for one person, but I found that if anyone else in the group has their own mess kit it could actually be beneficial for two people. 1.1L of water is enough to make two Knorr Sidekicks or two of most Mountain House meals, two cups of coffee in the morning etc. And if there isn't enough water in the first boil, it doesn't take very long to boil another full pot.

All of the included components work as advertised, my only gripe is that the telescopic foon is flimsy, cheap feeling and retracts itself under the pressure of you scraping the edges of the bowl for the last little morsels of food.

5. Value

Priced at $45.50 CAD at MEC, I believe this was a steal as some big box retailers offer crappier products that are bulkier and don’t include everything you need for a similar price. This complete storage system allows for a small fuel canister and a stove to be packed into it so the space and bulk savings in my pack is well worth the price tag.

6. Practicality

500mL of water took, on average, three minutes to boil, and a full pot took about five to seven minutes (under perfect conditions). This meant I wasn't waiting too long to eat my meals. I ended up sharing the pot with a buddy and it worked well for the two of us. This set is small and took up very little real estate in my pack. I’d say this is a perfect set for a backpacking or portage trip where the luxuries are left behind. It could also be used on a car camping or “glamping” trip where you would want instant coffee or instant oatmeal in the morning.


Noodles in the GSI Pinnacle Soloist bowl/mug/cup
Ain't nothing like a bowl of noodles after a long day of portaging!

7. Overall Impression and Final Score

Overall I am very impressed with this set. The pot boiled the water quickly, the cup held a generous amount of food and was soft enough to grip yet firm enough to not spill contents. The foon, unfortunately, was junk and I would recommend grabbing something else that is a similar size to keep the integrity of the way the set packs up. I never used the stuff sack as a sink, but it is capable of the function, even if it seems a little small. The entire set packs up tiny, and is pretty cheap. I will definitely be using this set in the future for my adventures and would definitely recommend it for your next adventure.

4.5/5 rating for the GSI Pinnacle Soloist
A well deserved score of 4.5/5 for the GSI Pinnacle Soloist

Thursday, 2 July 2015

Photo and Video Evidence: Man of the Year 2015

Another year has gone by and another one of our annual Man of the Year camping trips has come to a close. To keep with tradition we documented the struggles and hardships faced in all the challenges and feats of strengths in order to win the coveted title of Man of the Year. For the first time we also made a video, so be sure to watch it! We'd like to thank our friends at Honda Canada for powering our dreams and hooking us up with a Honda Fit to get to the Isle of Man.


A short video (make sure you watch in 720p or 1080p) followed by pictures of our weekend adventure!


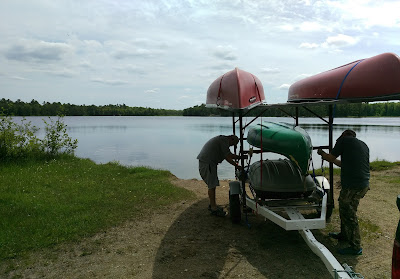
Unloading our custom made canoe trailer
Unloading our custom canoe trailer.


Unloading the Honda Fit
Unloading the Honda Fit at the boat launch.


Canoes sitting peacefully on the shore
We made it to the Isle of Man, time to set up and get fishing!

Tent set up with a view of the lake
Scott's tent all set up with a nice view of the lake.

Sam fishing on the shore
Sam trying to catch us some dinner.

Scott fishing on the shore
Scott fighting to reel in his 0.01 pound perch.


Porter sitting on a rock fishing
Who needs a canoe when you have a good sitting rock? Porter fishing like a boss.

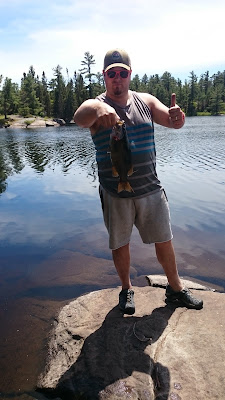
Scott caught a bass.
The fish we couldn't keep. Scott caught a fat bass that was unfortunately out of season off the shore.

Porter throwing his washers in washer toss.
Washer toss and beer is next! Porter showing off a champion technique of tossing washers.

Chris playing washer toss
Chris is focused and determined to get a sewer!

Top 3 Washer Toss Champs
Top 3 finishers. Also might be the only photo of Ed from the weekend as he was always behind the camera

The sun setting behind the trees on the lake.
The sun is setting over the lake.

Canoes shore side at dusk
The boats are packed up for the night.

View at dusk across the lake,
The views that we really do this trip for.

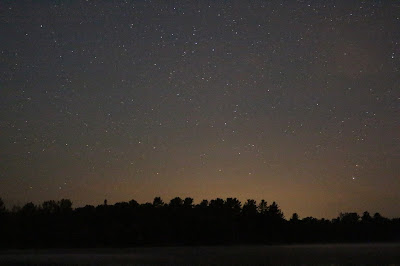
Tons of stars over the lake
Starry night.


View of the stars through the trees on our campsite
The stars through the trees on our campsite.

Campfire with a view of the lake
Campfire with a view.

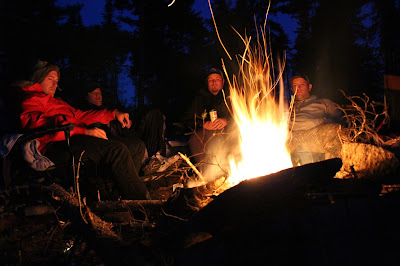
The boys sitting around the campfire
Enjoy the fire boys, tomorrow we crown a champion!

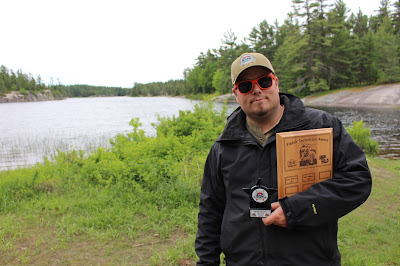
Fishing Technician and Sharpshooter winner Scott.
2015 Fishing Technician and Sharpshooter Champion


Xtreme challenge and Without a Paddle award winner Sam
2015 Xtreme Challenge and Without a Paddle Champion

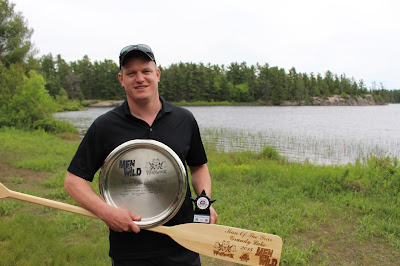
Washer Toss and Man of the Year 2015 winner Porter
2015 Washer Toss Champion and 2015 Man of the Year!


Porter being knighted Man of the Year 2015
Porter being knighted Man of the Year by the previous years winner Sam.

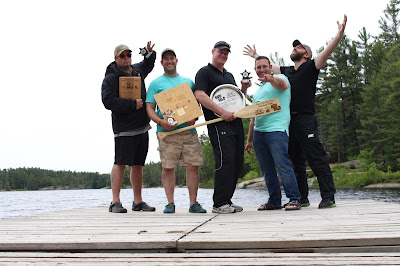
A final group shot of all of us and our awards
Another year of good friends, good times and memories that will last a lifetime!

Friday, 29 August 2014

Packing for a Weekend Canoe/Camping Trip

A post by Ed Arsenault.

I am back with another article on how to pack up for your upcoming adventure. If you haven’t already, be sure to check out my original article on packing up a carry-on suitcase for an all-inclusive trip.

The theme of today’s packing tutorial will be based on our annual Man of the Year camping trip. This trip sees us gentlemen off to the beautiful French River, Ontario region where we canoe out to our island and set up camp for two nights. This is by no means a survival trip or a survival packing tutorial as we still take many luxuries. This is a tutorial to help you pack less while still having some luxuries on a fun manly excursion into the woods for a day or two. With that said, I present to you my how-to pack guide for a not-so-serious weekend camping/canoeing trip.

Everything I would need for this weekend camping trip.

All needed camping gear

Pictured Above:

Clothing:
1 pair of swim shorts
1 pair of shorts
3 pairs of underwear
2 pairs of socks
1 pair of sweat pants
1 sweater
3 shirts

Accessories:
55L backpack
Fishing kit (reduced to have three spinners, bait, one lure, spare hooks and parts, gloves and a knife)
Fishing rod
Single sleeper tent
Heavy duty tent stakes
Sleeping bag
Sleeping pad
15L compression sack
PFD
Water shoes
Fillet knife
Utility knife
Flashlight
Bungee cord

Not Pictured:

Clothing I wear day of:
Comfortable shoes
1 pair of shorts
1 t-shirt
1 hat
Sunglasses

Accessories: 
Folding chair
Snacks (jerky, trail mix, granola bars)
Dinner (stored in a group cooler)
Toiletries (I brought them but didn't show them in this tutorial) 

The Process:

Uncompressed Sleeping Bag
Uncompressed sleeping bag (black) and 15L compression sack (bright green).

Sleeping bag compressed to fit in backpack
Compressed sleeping bag ready to be packed.

Tent Stakes Added to Back Pack
 I add the tent stakes first to the bottom to avoid any tearing and ripping of fabrics.

Putting my Tent Into my Back Pack
Then I squeeze my tent into the lower 10L compartment of my bag on top of the stakes.

Now I put my sleeping bag in through the opening up top. Note that I put in vertically then maneuver it to be horizontal in the bag.

Adding my fishing kit to my pack
I then add my fishing kit and squish it in beside my sleeping bag on the front side of the pack. This gives me a nice flat front to my bag.

Adding clothes to my pack
Next I jam my clothes into the sack on top of the fishing kit and the sleeping bag. *I would recommend a compression sack for all your clothes too. I, unfortunately, didn't purchase one in time for this trip but will in the future.

Bag is nice and sturdy and has a flat front
Here you can see how sturdy this set up is and how flat the front of the bag has become.

Adding flashlight and bungee cords to side pocket
Utilizing the side pockets of my pack, I place my flashlight and a few bungee cords in. I use bungee cords on trips like this because it is quick and easy to set up a clothes line or whatever else you need with no knots.

Adding knives to side pocket of pack
On the opposite side pocket I pack up my fillet knife and utility knife.

Strapping sleeping roll onto front of pack
 Using snaps already on my bag I then attach my sleeping roll to the bottom of my pack. The material of my sleeping roll repels water and would dry the quickest if I were to get caught in rain, hence leaving it on the outside.

Securing tent poles and fishing rod to my pack
 I use the slot for a drink in my bag to be the base to hold up my tent poles and fishing rod. Using some straps already on my bag I just tighten them up to keep the rod and poles secure. 

Attaching my water shoes with a carabiner
Using a carabiner I then attach my water shoes to my pack on a strap that doesn't move too much on the opposite side of my rod and tent poles.

Attaching a PFD via a carabiner
Last but not least I attach my PFD to my bag via a carabiner to a strap near the top. This way the PFD doesn't hang too low when walking.

All packed up and ready to go
My bag is all packed up and I am ready to go canoeing and fishing for a few days. *Note, I forgot to zip up my PFD for this photo, that's why it is hanging awkwardly. 

There we go, I have a full pack that is not too heavy and two free hands to carry my folding chair and most importantly a case of beer! I know the guys that I go on this trip with and can pack according to them and what they bring. That is why I have opted out of most "essential" items. Between you and your group, make a list of who has what and spread the load carried. 

I hope this helps you get an idea of what you would need for a quick excursion into the woods with some buds. If you think I missed anything important or have anything you'd like to say please reach out to me via the comment section below, Twitter or Facebook.

Thursday, 14 August 2014

Simple Ways to Outfit a Fishing Canoe

A post by Scott F

No one is going to debate that having a big ol’ bass boat is pretty fancy. But fishing from smaller vessels, like canoes and kayaks, opens up some opportunities unavailable to those inclined to motorboat madness: access to “virgin” lakes where engines are prohibited, ease of transport, maneuverability to access tight coves and rivers, quiet and serenity, physical activity, and the numerous options opened up by the ability to portage, just to name a few. Fishing comfortably and effectively can be challenging without a properly outfitted fishing canoe. Below are some suggestions for making your excursion comfortable and efficient without going to extreme measures.


Canoe Seats

Whether you’ve been paddling for years or are a “newb,” it’s unlikely that you’ll stand up after a long paddle and not have your back feel like a rusty hinge. Having a seat back allows you to shift positions and lean back to relieve pressure. They make both paddling and fishing quite relaxing. I use the GCI Outdoor Sitbacker, highly recommended (watch for an upcoming Real Man Approved review). Find them on Amazon (buy multiple to save dolla bills).

Canoe seats

Canoe Anchor

The same benefits that make a canoe ideal for a quiet day of fishing - lightweight, engine-free, maneuverable - also make them susceptible to wind. Without a way to hold yourself in place, even the lightest breeze can push you into the reeds; forcing unwanted paddling every two or three casts. Traditional grapple, navy, river, claw or mushroom anchors are heavy, and while you might be able to get away with a 3-5 lbs version, it’s weight you would rather avoid. One very simple and highly effective solution is to use an anchor bag and nylon rope. Simply bring a tough, easy-to-drain bag and fill it with rocks prior to setting off. I use polyester mesh bags, but have seen burlap and other materials used as well. Weight-free during transport, and perfect for keeping you in place while you hunt the big one. A good anchoring system, preferably mounted at the bow of the canoe with a pulley system with which to operate it from the stern, is a wise investment.

Canoe Rod Holder

If you’ve spent a pretty penny on your rod the last thing you want is to have it smashing around in the belly of your canoe while you paddle. A simple road holder system, either store-bought or homemade, can solve this issue. My homemade version (created by my father) is just a piece of plastic pipe attached to a clamp (from an old fish finder) with a pipe clamp. Just make sure your solution fits over the gunnels and gunwales of your canoe. Find the mounting location that works for you; for me, it was behind my seat. Added bonus: having a rod holder opens up trolling as an option while you paddle.

Canoe rod holder

Canoe Cup Holder

Whatever you’re drinking during your paddle, chances are that without a sturdy holder, it’s going to end messy. A good, solidly mounted, well placed cup holder will allow you to keep your mind on what’s important, fish, the beautiful day, or perhaps nothing at all. I found out that double sided tape is not enough to secure my holder, so proper mounting is key.

Canoe cup holder

Canoe Gear Straps and Holders

As mentioned with the rod holder, keeping items out of the belly of the boat will help with comfort, and will also reduce noise and stress. Straps, bungee cords, carabineers and mounted hooks can all be used to secure items such as nets. If possible, suspend your tackle box from the yoke or a thwart to keep it dry and accessible.

Other, more complicated options for improving your fishing canoe include adding outriggers, spray covers, trawling motors etc. Let me know in the comments how you outfit your canoe for fishing, and leave a link to a picture if you have it.