Showing posts with label Bike. Show all posts

Wednesday, 1 April 2015

Real Man Tested: RAM EZ On-Off X Grip Bike Mount

Review by: Ed Arsenault

Every once in a while you come across a product that just makes sense, and you wonder why no one thought of it before? That's exactly the case with the RAM EZ On-Off X Grip Bike Mount.

The product promises to hold your phone or similarly shaped object as you cruise around on your bicycle with their patented X Grip system. We here at Real Man Travels like to bike so I purchased one for myself from the fine folks at RAM Mounting Systems and put it through the ringer.

1. What you get:

The package arrived with:
  • 1 X Grip phone mount
  • 1 Mount insert
  • 2 bar attachments (to suit your bar set up)
  • 1 piece of 3M rubber
  • 2 black cable ties
  • 1 set of instructions
Included Items
X-Grip Mount, cable ties and bar attachments
 2. Look and Feel:

The EZ On/Off mount initially feels solid and durable with its hard plastic casing, strong metal arms that have very little flex, and thick rubber tips that make contact to your device. If you squeeze the arms and then let them release on their own, you will see the strength in the spring that is meant to hold your device in place.

The pieces for mounting to your bike are also built from the same thick plastic but the method for attaching them to your frame are just generic cable/zip ties. If you plan to move this mount between a few bikes then you can purchase these zip ties from any hardware store for dirt cheap.

3. Set Up:

The set up process was very simple. You first attach the 3M rubber around the bar where you plan to have the mount (this prevents the mount from slipping or sliding). Then you attach the bar clip of your choice to the frame using the two provided cable ties which need to be pulled tight. I would recommend pulling the ends with a pair of pliers for that extra click or two your bare hands can't get.

Step One: Attach the 3M Rubber around the bar
Step 1: Attach the 3M rubber around the bar

Step Two: Set the bar attachments on top of the 3M rubber
Step 2: Set the bar attachments on top of the 3M rubber

Step Three: Pull the zip ties through the slots and tighten them up. Cut off excess.
Step 3: Pull the zip ties through the slot and tighten then up. Cut off excess zip tie straps.
Next you will insert the X grip mount by pushing it down and twisting it slightly. Once you hear the click the mount is in. At this point you can set the mount to be in portrait or landscape mode when you attach your phone.

Step Four: Attach the mount in either portrait or landscape
Step 4: Attach the mount in either portrait or landscape
To attach your phone you simply squeeze the spring loaded "x" arms and then place your phone down and let them open against your phone. The spring loaded gripping arms will hold your phone snug at this point. Adjust the phone as necessary, but try to make sure it is as close to the middle as possible to avoid balance issues.

4. Ease of Use:

After installation this product is a piece of cake to use. It is always as simple as squeezing the X grip arms and releasing. It is easy to remove the X grip mount by simply pushing down and twisting it off.

Unfortunately the remaining pieces stay on your bike with cable ties so moving from one bike to another with one system is not easy. If you do wish to move the entire mount then you will need to cut the cable ties and have more handy to reattach it. You may also want some extra 3M rubber as well.

5. Actual vs. Advertised

I feel confident that this product delivers on its promise. I have ridden over 200km with this mount and my phone attached to my handle bars. I have ridden on many different terrains and landscapes including busy paved city streets and gravel country roads and my phone has been snug and secure the entire time.

While the mount does hold your phone in place it does come with one minor flaw. After placing a phone into the mount there is a small swivel of about 15 degrees. This will make for a small annoyance to those who have light OCD as it will sit just off kilter. You can swivel it back those few degrees, but after a bump or two it will revert back.

The arms of the spring loaded mount can latch on to most phones with a 4-5” screen (if you are using a phablet then I’d recommend staying away from this model). I tried an iPhone 4s, BlackBerry Z10, BlackBerry Q10 and a HTC One (M8). It can attach with or without your phone case on, just as advertised.

While the spring arms don’t obstruct the camera lens (which is great if you want to record your rides), the angle of the mount cannot be changed without cutting and reattaching cable ties. Therefore filming with this mount can be a pain. If you are looking for a mount to film with you may want to check out another one of their products intended for that purpose.

6. Value

I purchased this mount for $28 plus taxes and shipping and handling. When all was said and done, to have this in my hands, it cost me $45 (CAD). I believe that the mount is worth the $45 (CAD) price tag because you get a solid phone mount that is universal and doesn’t require any special cases or any tools to install it.

7. Practicality

The RAM EZ On/Off mount made sense on one of my long haul rides because I could have my navigation up and running in front of me at all times. As well as have a tracking app on that would show distance covered, average speed and more. There was no need to reach into my pocket and stop and check for these details. For use around town, or for quick bike errands, the mount has little to no purpose. Without needing navigation or statistics, my phone just sat on the mount with the screen off the entire time.

Phone attached and navigation on
8. Overall Impressions and Final Scoring

Overall, if you intend to use your phone as your main tool for navigation, stat tracking or even just as a music player then this mount will be a great solution. It is sturdy, grips your phone tight and after 200km of riding it hasn’t once given any indication that the device wasn’t safe.The best part is you don't have to buy another mount when you upgrade your device!

My only complaint is that the mount does rotate just slightly during rides, but that is more of an OCD issue. Hopefully newer models of this mount will address this issue. 

I'd give this product a 4/5 and would definitely recommend this product to anyone looking to hold their gadgets on their bike. 

4 Real Man Beers our of 5
Score: 4 Real Man Beers out of 5


You can order this directly from the manufacturer here, oryou can try Amazon (that is where I got mine from).


Happy riding!

Monday, 23 September 2013

Toronto to Welland:136 km Bike Challenge

Ideas to do crazy things always seem to be created over a few drinks, but hardly ever get followed through. On September 14, 2013 I am proud to say that my good friend John and I followed through on a crazy idea and rode our bikes 136 km from Toronto, Ontario to Welland, Ontario. The best part of this is that we decided to embark on this adventure just 6 days before. This left us no time to over think it and best of all no time to train. The challenge to ourselves was to take the long ride in our current physical state.

Like most crazy ideas, people we told had many different reactions including: “You’re doing this ride…by choice?”, “You two are going to die”, “You guys are stupid” etc. We never let it bother us because for every naysayer there was someone cheering us on. We even had some friends get us some good luck drinks the night before our ride. Was it the best idea? Probably not but we can say now that we did the first portion of the ride hung over…like real men.

Getting ready to ride at 4:00 am. 

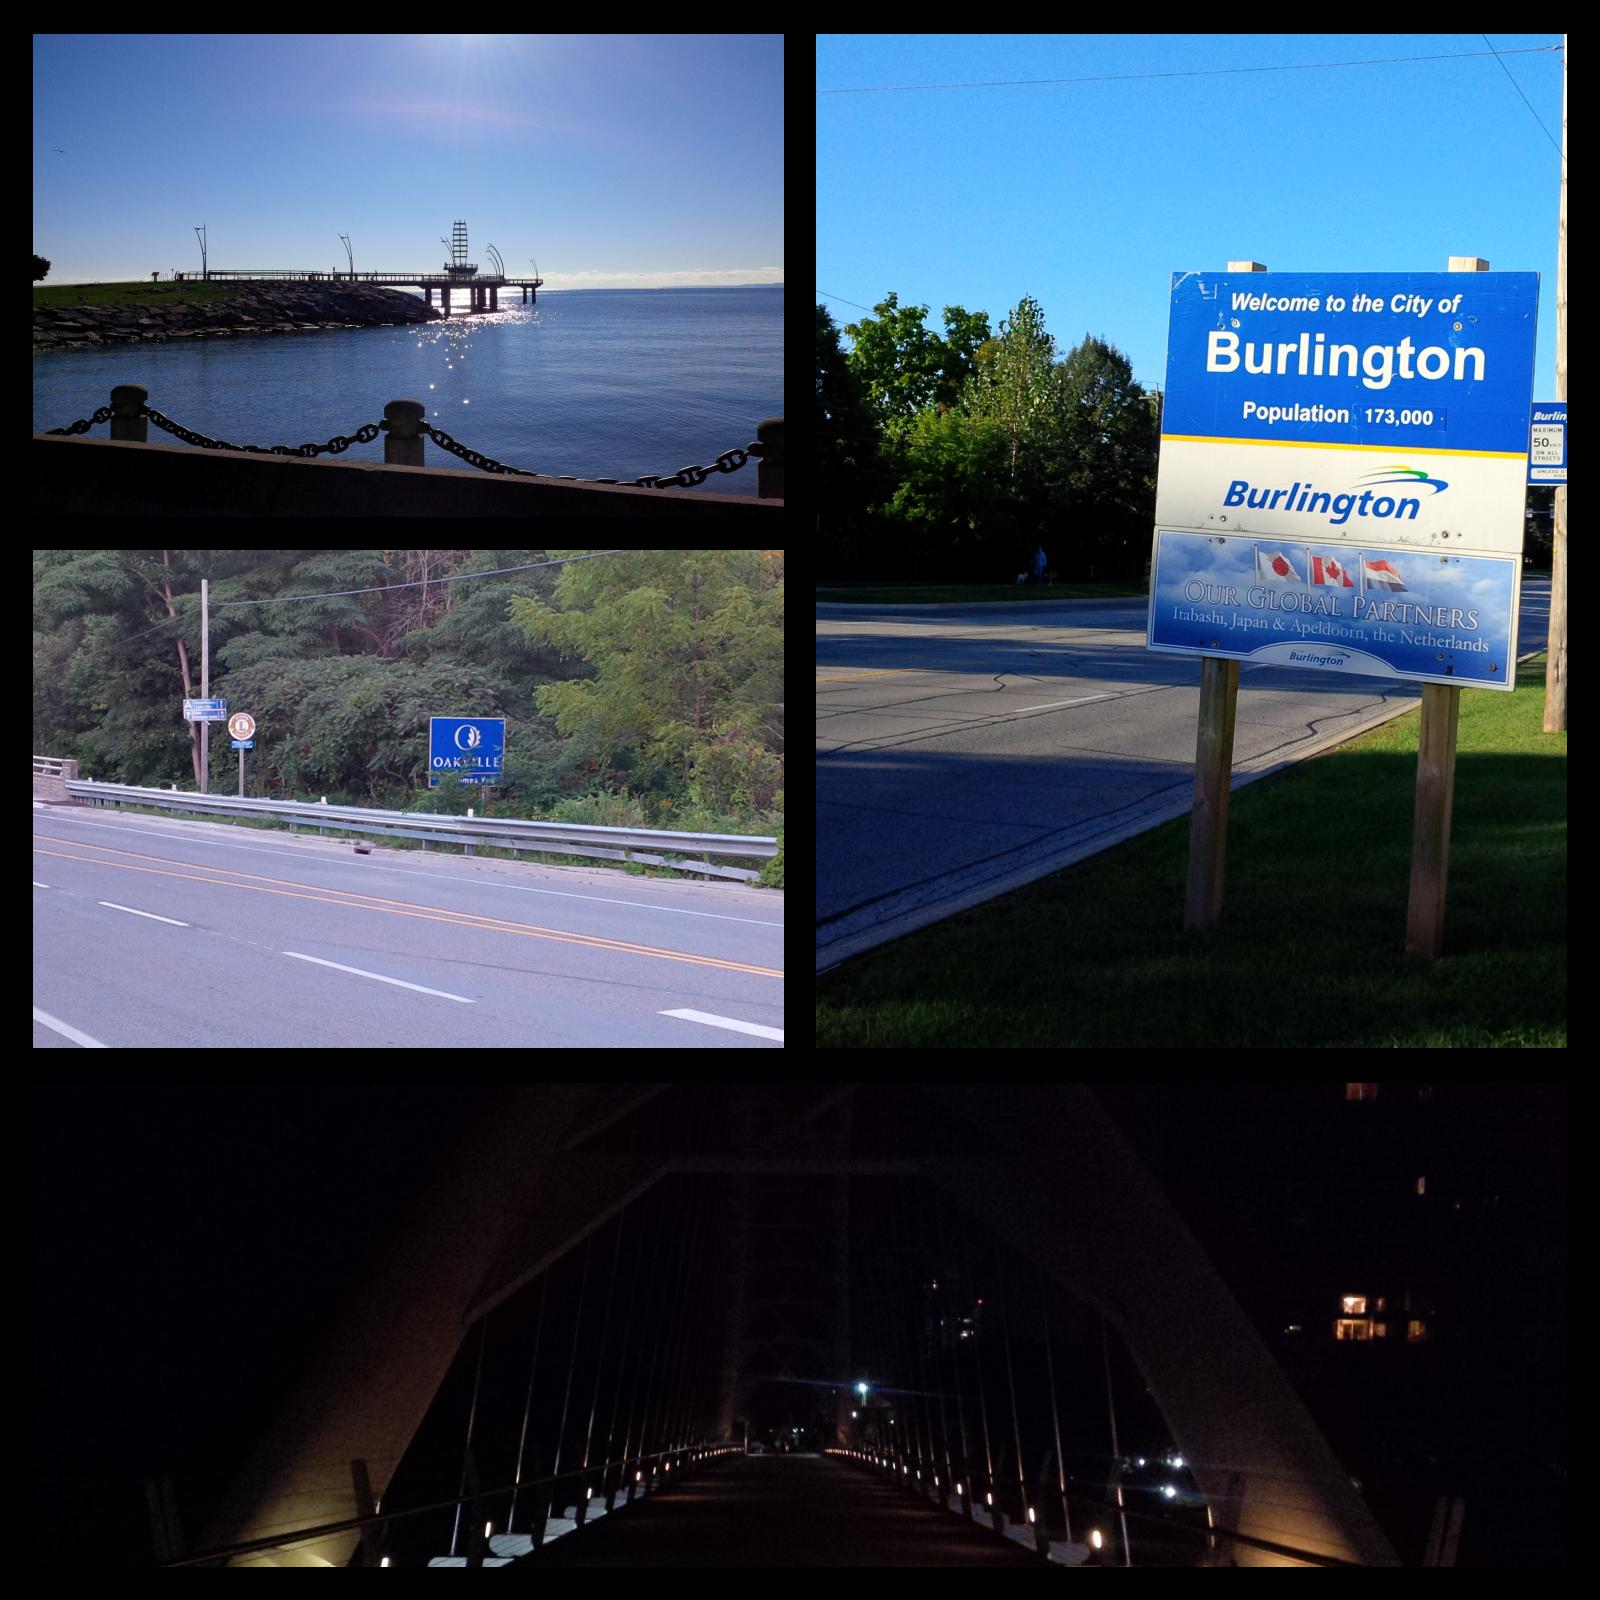
With our backpacks loaded up with water and snacks, a change of clothes and some necessary tools/repair items we met up at 4:00am in Toronto to begin our 136 km ride.  For the first half of the ride we would be following the Waterfront Trail. The Waterfront Trail is a series of connecting paths that spans from Windsor, ON to the Quebec and Ontario border for a total of 1400 km. This first half took us through Etobicoke, Port Credit, Mississauga, Oakville, Burlington and a small slice of Hamilton. Out of these areas Port Credit and Mississauga had the most scenic views. When we arrived in Port Credit a boatload (pun intended) of fishermen were loading up there vessels and it felt like we were cruising by the docks of a coastal town. The portion of the Mississauga trail featured the most parks and was quite in tune with nature and really changed my view that the city is indeed more than town homes and condos.


Some shoreline shots between Toronto and Burlington

 
My least favourite stretch was the Oakville portion of the trail. It seemed like they didn’t really care about the trail and just threw signs up along the roads. The first portion of Burlington felt this way as well but quickly changed when we got to the developed waterfront area. This was approximately the 68 km mark and we decided we would walk along the trail and see some of the sights they had. This included a model boat pool, a snack shop, beach rentals and memorials. It was a nice area but we still had a large portion to go so we rode onward under the Skyway Bridge. Along a small stretch of the trail in Hamilton before we would turn off of the Waterfront Trail for good, we decided to stop and have a beer. We grabbed a seat on some rocks in the water and cracked open a Steam Whistle and looked across Lake Ontario to see Toronto off in the distance.

A much needed beach beer break.


The next portion of the trip would see us through Stoney Creek, Grimsby, Beamsville, Vineland and finally Welland. The ride to Stoney Creek was good and smooth, we had left the trail and were mostly on roads but they were quiet enough where we could ride side by side and talk. While biking through Stoney Creek we made one big mistake. We were in an area with lots of options for restaurants to grab a bite but decided to push on to Grimsby in the hopes of knocking out a few more kilometers. There are a few rules that you should abide by when being adventurous:

  1. Eat before you’re hungry
  2. Drink before you’re thirsty
  3. Layer up before you’re cold
  4. Layer down before you’re hot

In our case we lost all fuel in our bodies before reaching Grimsby to eat and it was a complete struggle to move. We actually ended up taking a half hour break in a wine field and just laid down using our packs as pillows. After a quick Google search we found a pub that was just a mere 16 minutes ride away.

When we finally arrived in Grimsby we ate some lunch and then John asked the bartender to inspire and motivate us because we needed it and she told us a tale of how a 60+ year old couple rode in from Toronto, had lunch and then continued on to Niagara Falls the week prior. We looked at each other and knew we couldn't quit if someone 40 years older than us had done it. So we grabbed a red bull and hit the road. On the way out of Grimsby we passed a church that had a message on its sign that I feel was intended for us. I can’t remember it word for word but it was along the lines of success is yours to make. That was a piece of motivation I needed to continue and finish the last 43 km.

Misc photos from along the way.


The last 43 km were the toughest by far, not only were our knees, legs, butt and shoulders sore but now we had reached the escarpment area and had to battle hill after hill. Despite the hills, the scenery in this area was amazing. Rolling hills and wineries as far as the eye could see. It was a truly beautiful area to bike through. 

After another short break to rest our legs (at that point we were 19km from Welland) we pushed on and John started to recognize the streets of his hometown. When we arrived at Pelham Road his eyes lit up and I knew we were close.Being closer gave us both the push and drive to pick up our pace. When the "Welcome to the city of Welland" sign appeared it felt like a gift from the heavens, we had made it! We stopped to take a photo in front of the sign with our bikes held high (took John 2 tries to lift his up heh) and then we were off to John’s parent’s house which was around the corner where Frank Campion (@FrankCampion1 - Councilor Ward 2 of Welland) had set up accommodations for us.

Upon our arrival we were greeted with smiles and victory shots that were already set up on the table. I won’t forget what Frank had said about the shots already being poured, “I didn't know when you guys would arrive, but I knew you wouldn't quit”. That’s what the trip was all about, not how fast we got there but rather about pushing ourselves and not quitting on each other/ourselves and accomplishing the goal of making it.

We made it!


The funny thing about the second half of the trip is that we lost all motivation to stop and take pictures. At that point it simply became get the trip done! I personally regret it because we passed some beautiful wineries and interesting sights and I am unable to share them with you all. But what I can share now are some tips for long bike rides that we learned from this adventure:

  1. Bring heavier snacks, granola bars were good, but a sandwich or something with more fuel helps when your miles away from a restaurant.
  2. Don’t wear a backpack, invest in a rack and some panniers to carry the load.
  3. Take as many breaks as you need
  4. Every 20-30 minutes stand up on your pedals while riding and get your full weight off your butt
  5. Whenever possible ride side by side to talk and distract your mind from the pain in your body
I recommend trying to push yourself on a bike trip whether it be 30 km or 300 km. There is a great satisfaction of making it somewhere using only your muscles! If you have any similar adventures, please feel free to comment below about it, I’d love to hear! And if you have any questions about our trip ask away, I’d be happy to answer.

Here is a video slideshow: